The day finally arrived when I found a girl that wanted to share in my misadventures! The trouble is, my seven year old Lynx 2 just isn’t large enough for two people AND their jackets, helmets and boots… So I opened the wallet, blew out some of the dust, and placed an order for the Chaos 3 tent by Alps Mountaineering.
 |
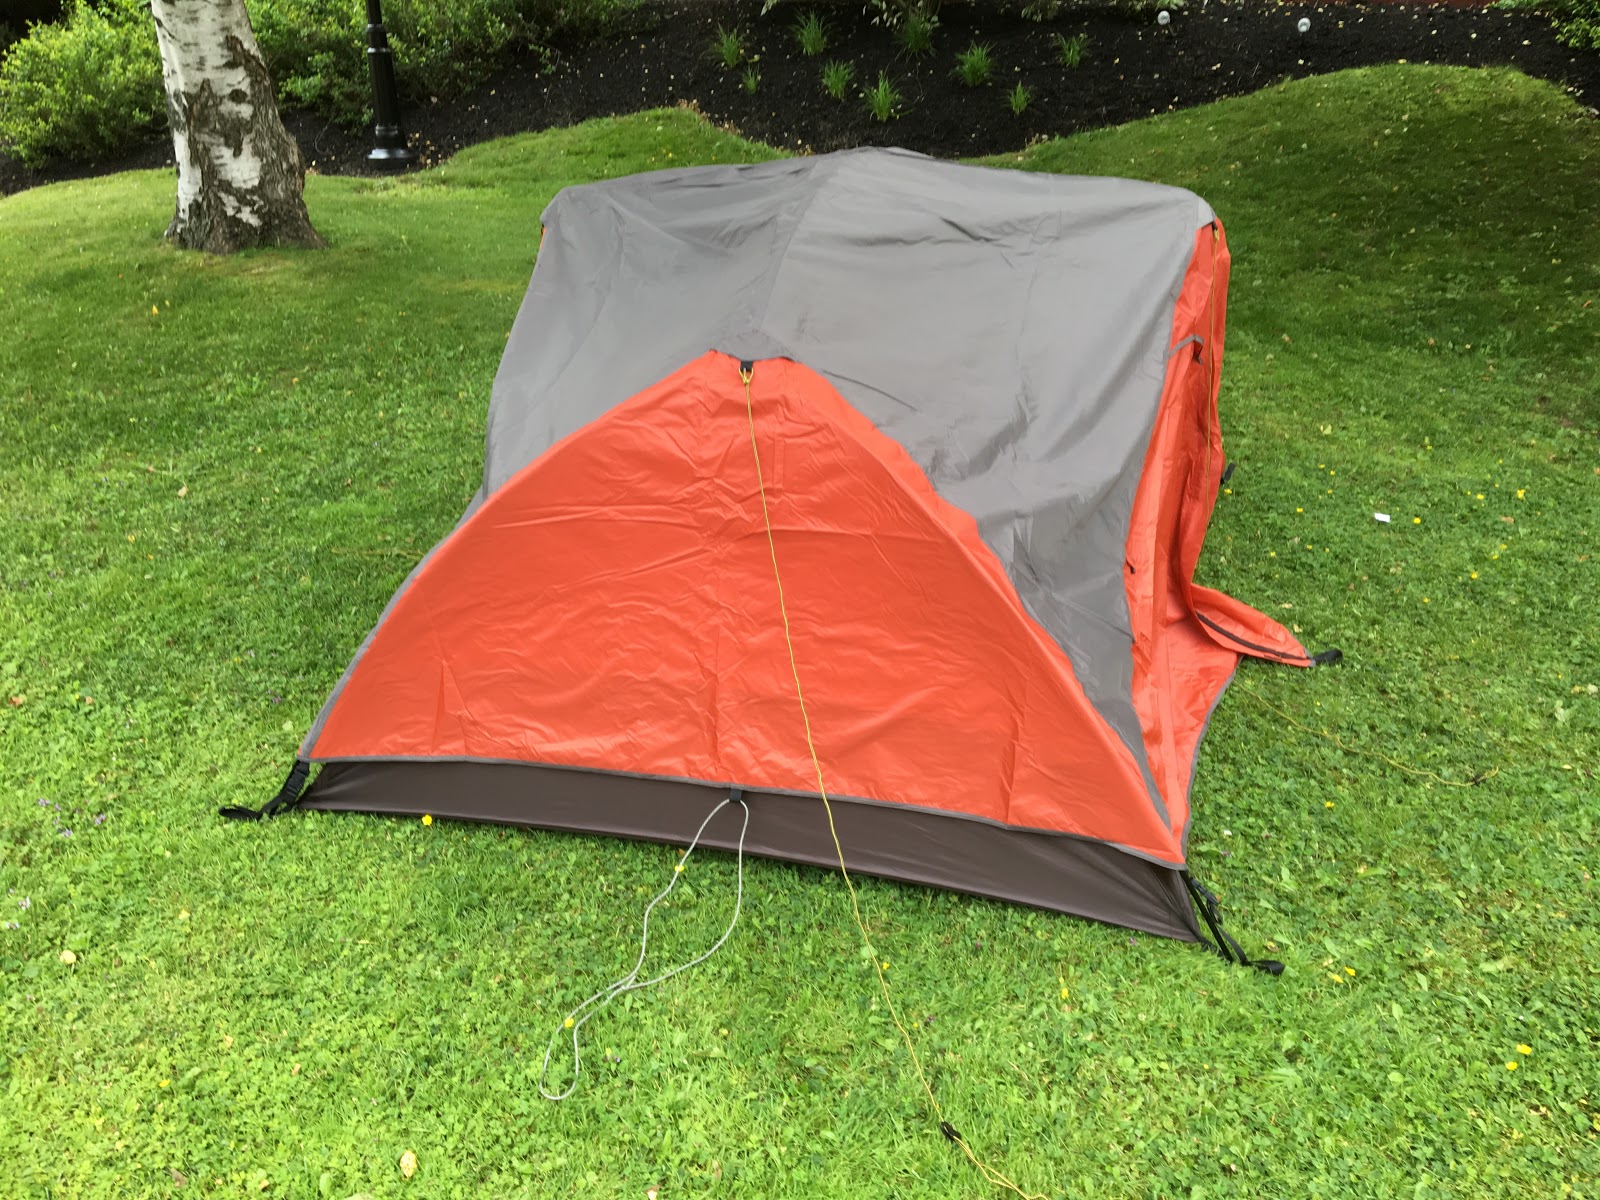
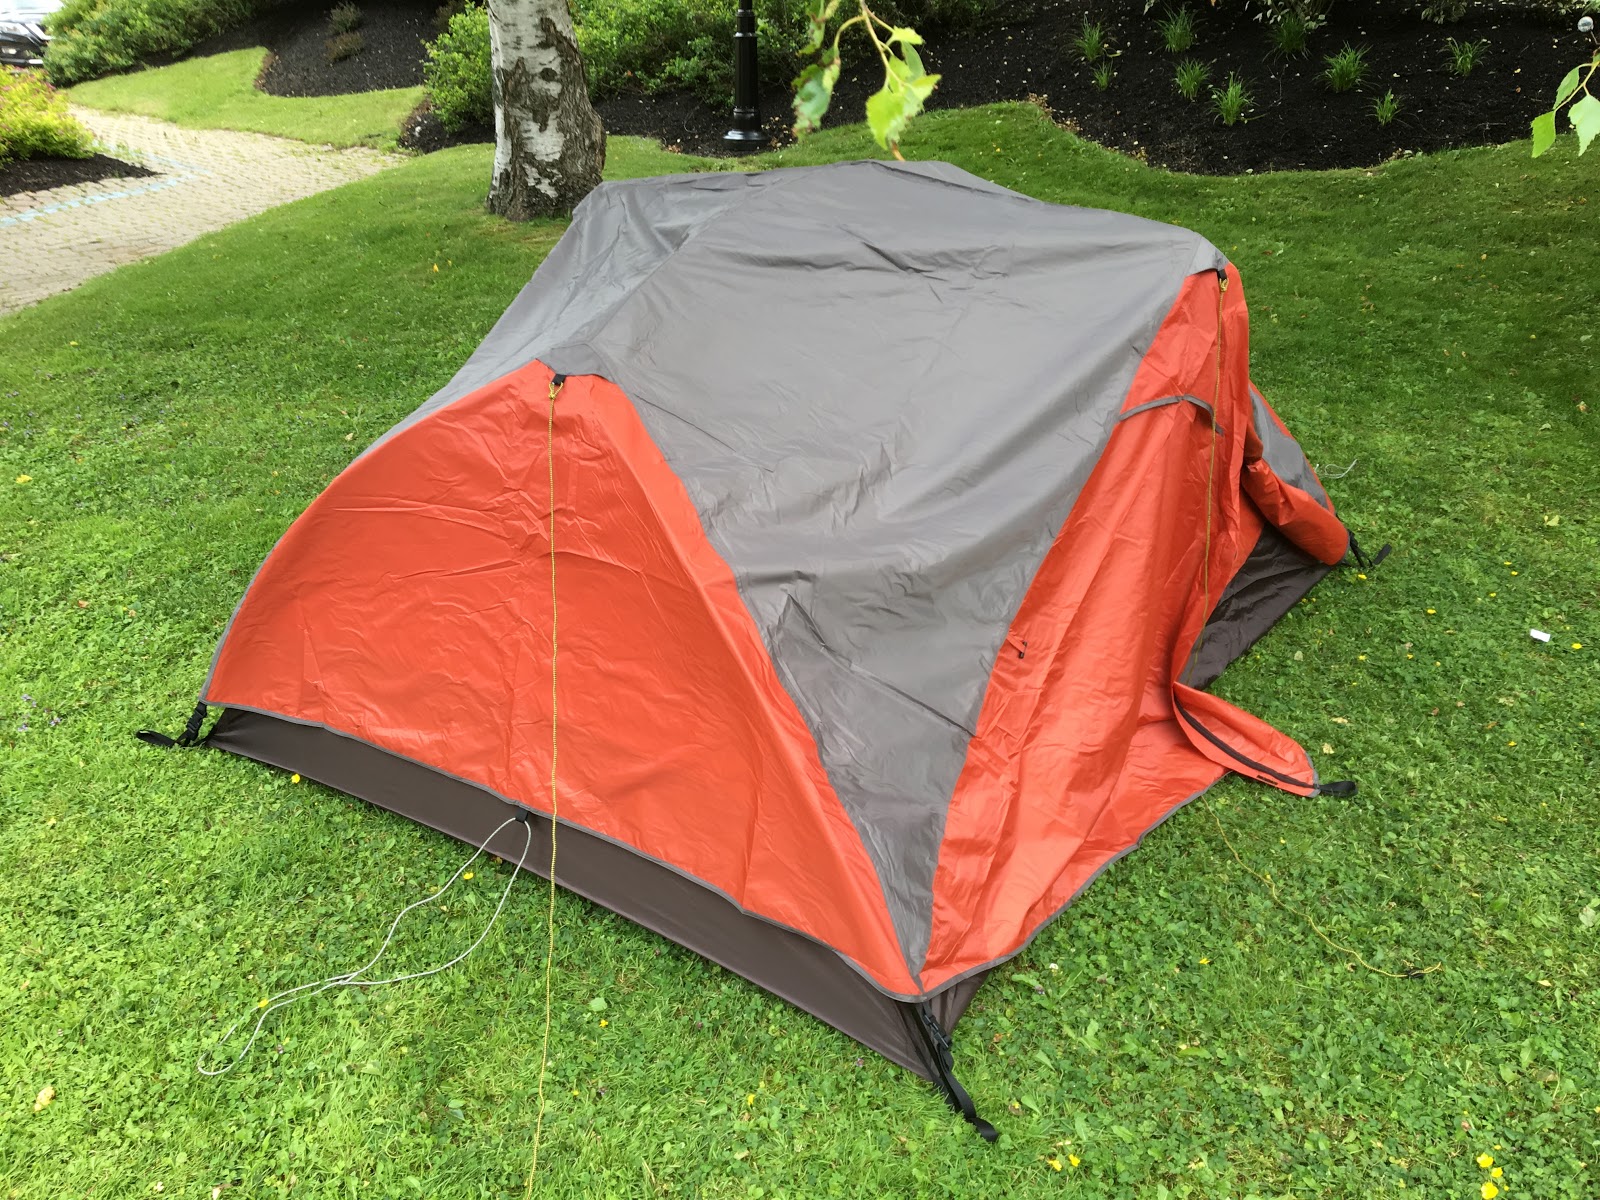
| The Alps Mountaineering Chaos 3 |
After paying for the floor saver, taxes and shipping charges, I think I am into this tent for $300 Canadian. You can do much better than the manufacturers suggested retail price of $279 USD, so shop around.
 |
| Pictured with rain fly |
 |
| Chaos 3 by Alps Mountaineering |
Why the Chaos model? It has more interior mesh than the Lynx 2 so it should offer more ventilation for hot summer weather. The cross bar supports the sides, so in addition to more available headroom than the dome, it also keeps water from dropping down INTO the tent which imho was the Lynx 2s single biggest failing. During a rain shower in the Lynx 2 you had to keep the rain fly zipped 1/2 way to channel the water down away from the inner tent. It’s a dome shape, think about it.
 |
| The Lynx 2 set up at Soldier’s Bay Nova Scotia |
It’s a couple of pounds heavier, but basically the same pack size and should give us enough room to store our helmets, jackets and boots inside the nice dry tent with us.
Optional Accessories:
You may find as I did, that the Alps tents can benefit from items such as a footprint, some better engineered tent pegs, etc. I did this with my Lynx 2 and have already bought a new footprint and a set of decent tent pegs. I’ve plenty of 550 paracord to make my own guy ropes if there are any needed for the Chaos 3. (It needed them)
- Footprint
- Tent Pegs
- Guy ropes
I purchased the tent from Motorsport.com a week and a half ago, and the floorsaver from Amazon.ca and they just arrived at work today, so now I have dreams of pitching a tent on the Company lawn after work! Yeah, I can get a bit weird like that. 😀
Unboxing and first pitch:
|
| The Alps Mountaineering Chaos 3 |
Shown with the spreader pole installed, this is the magic of this tent… My old Lynx 2 would allow rain to drop straight down onto the tent floor if the fly was not zipped up to within 12 to 18 inches of the ground, while this tent uses the spreader to allow you to have the rain fly doors rolled up and out of the way if the rain is not driven sideways.
 |
| Setting up on the lawn outside my apartment building |

The pale guy rope in the centre is one of two I just added. When the tent is guyed out, you want to stake these two ropes out so the rain fly stands off of the interior tent. And speaking of guy ropes, they added a strange tensioner that seems overly complicated. It’s a black piece of plastic with a friction portion that just isn’t intuitive.
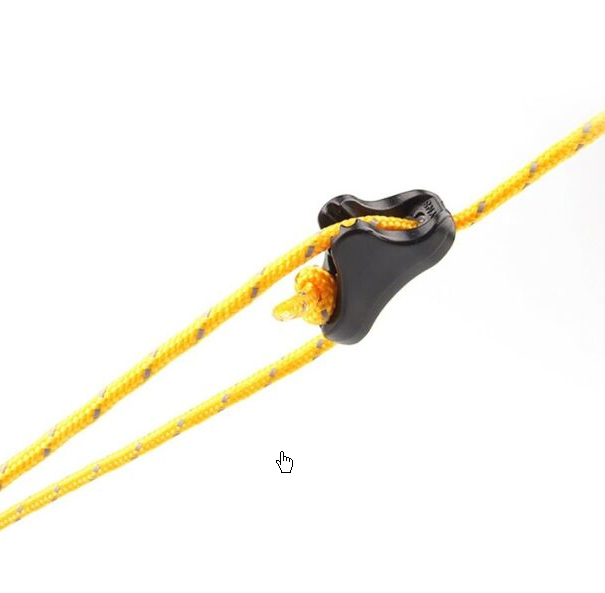 |
| This is it, and I find it overly complicated – Guy rope tensioner |
 |
| I bought a lot of ten of these guy rope tensioners for $3 |
So today I shelled out a whopping three dollars and will replace the supplied guy rope tensioners with some primitive stone aged ones that have been working since man learned how to make rope. I sourced them on AliExpress and with free shipping should arrive in time to make a November birthday present to myself. Seriously, my girlfriend, while we set this up in the rain (speed was critical) wrapped the guy rope around the pegs as she did not have the time to sort out how they worked, and why would you? The Alps Lynx 2 used the tried and true two hole plastic tensioner.

One of the elements I loved about the Lynx was all the guy ropes were on the four corners of the tent, with none in front of the doors themselves, but not so with the Chaos 3, so I’ll ask everyone to kindly watch their step when entering and exiting the tent.
I miss the “window” that the Lynx 2 boasted, but I think my girlfriend wouldn’t have been so happy with a window in the Chaos… I still can’t figure out why not though. I like them on a rainy morning or in the evening when you hear something stirring close by.
The included gear loft needed to be hung up, and I had to have a do over, as it is a diamond pattern instead of square, and I hooked it up incorrectly the first time.
Disassembly and Put away:
It went down fast, and when I say fast, I mean in under ten minutes I had my brand new tent rolled up and back in the stuff sack ready to roll.
- Remove the ten tent pegs used to secure the tent and fly
- Place the tent pegs into the stuff sack
- Remove the four rain fly buckles
- Remove the rain fly, and from the top, fold the wings in half and half again until you have a long narrow sausage of a rain fly.
- Remove the clips from the spreader pole
- Remove the spreader pole and set aside
- Remove the clips from the main pole structure
- Remove the poles from each of the four corners of the tent.
- (Reinsert the “ferrule” portion of the poles)
- Collapse the poles
- Place the poles in the stuff sack
 |
| These “ferrules” may pop out on you. I was three for six today. |
- Fold the tent lengthwise in thirds
- Place the rain fly on top of the tent
- Place the poles (already in stuff sack) on top.
- Roll the tent using the poles to keep it taut and tight, pulling towards you, keeping the guy ropes off the fly inside the roll.
- Knead the air out of the tent roll, and place into the stuff sack.
- fold the floor saver and return it to it’s stuff sack
- Close the tent stuff sack after inserting the floor saver and tent pegs.
 |
| Getting ready to put it away. |
Pros:
- It goes together fast. You can have this up and standing in the rain less than five minutes if you forget about the tent pegs for a minute or two.
- Lots of mesh, and with the spreader bar, you can ventilate the tent in a light rain shower.
- Roomy for two people, with extra room for motorcycle gear. Alps reliability. Well made for a decent price.
- Freestanding. Erect it, then decide where it needs to go on your campsite.
- The rain fly buckles on and off.
- Fantastic quality and durability that I’ve come to expect from Alps Mountaineering
Cons:
- The tent is not a backpacking tent and is quite heavy, but if you were hauling this up a mountain and spread the load between those three people, I’ll take those words back and hope you will all be comfortable.
- The “ferrules” pop out of the poles when disassembling the tent, and are a minor annoyance to deal with.
- There are two guy points that will need user supplied guy ropes and pegs.
- Supplied pegs are waiting to hit a rock and become pretzels, and won’t do well in a sandy soil.
- The tent stuff sack is on the small side, and you will have difficulty getting a wet tent back into it. A dry tent can be a struggle to get into it.
- The complete tent and floor saver have some weight to them.
- Two doors, but with two guy ropes needed right in front of those doors.
- The guy rope tensioners are a new fangled over-engineered and poorly thought out complication.
- It can take two hands or a hand and a foot to unzip the screen doors, which is not ideal if your hands are full.
Would I recommend this tent? Absolutely, but as I did with my Lynx 2, I give it four out of five stars.
Cheers!
Update: 2019-07-29
Update: 2019-08-05
Caroline and I did a ride around the Gaspe peninsula on the long weekend, and we ended up inside this tent during a heavy downpour, a couple of nights in fact, and even with the rain fly vestibule open, water didn’t get into the tent.
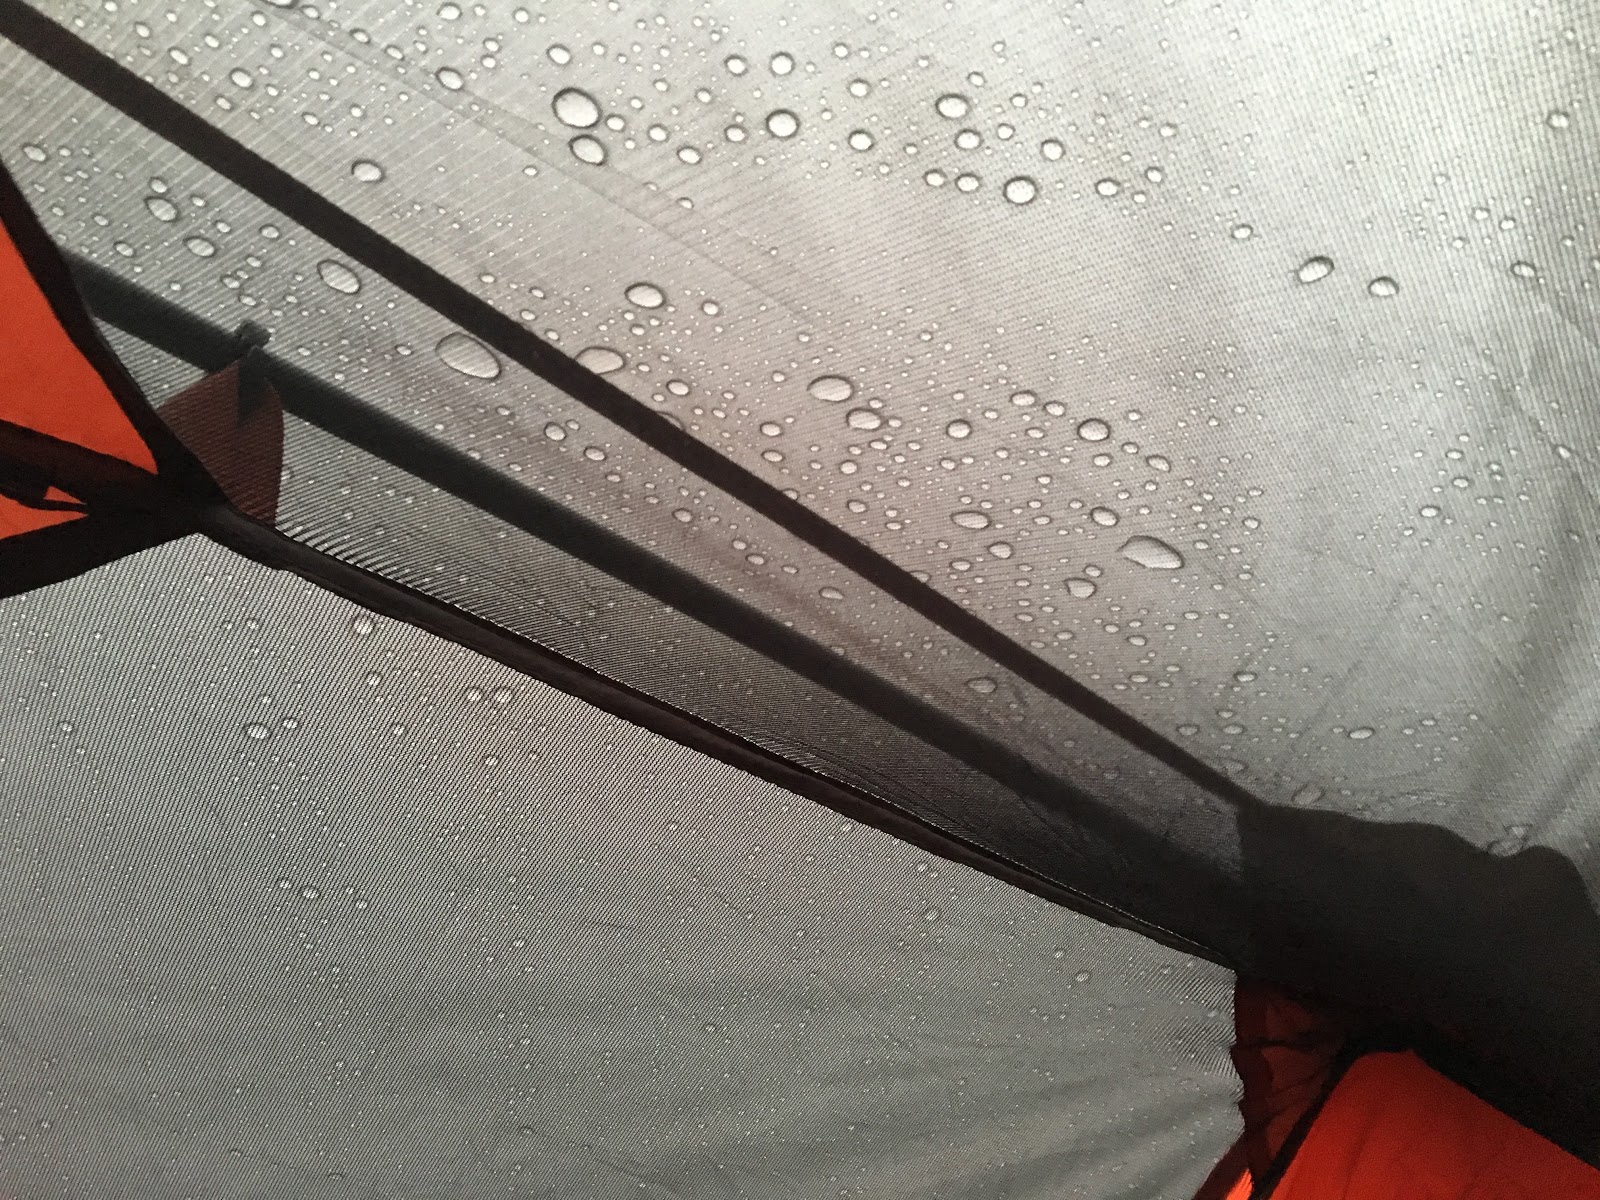 |
| It beads then a larger bead runs off the tent and down. |
I’m so much more used to the dome tent of the Lynx 2, but this one works even better at keeping me dry, as I can finally leave the rain fly rolled up with out water dripping down onto the floor of the tent.
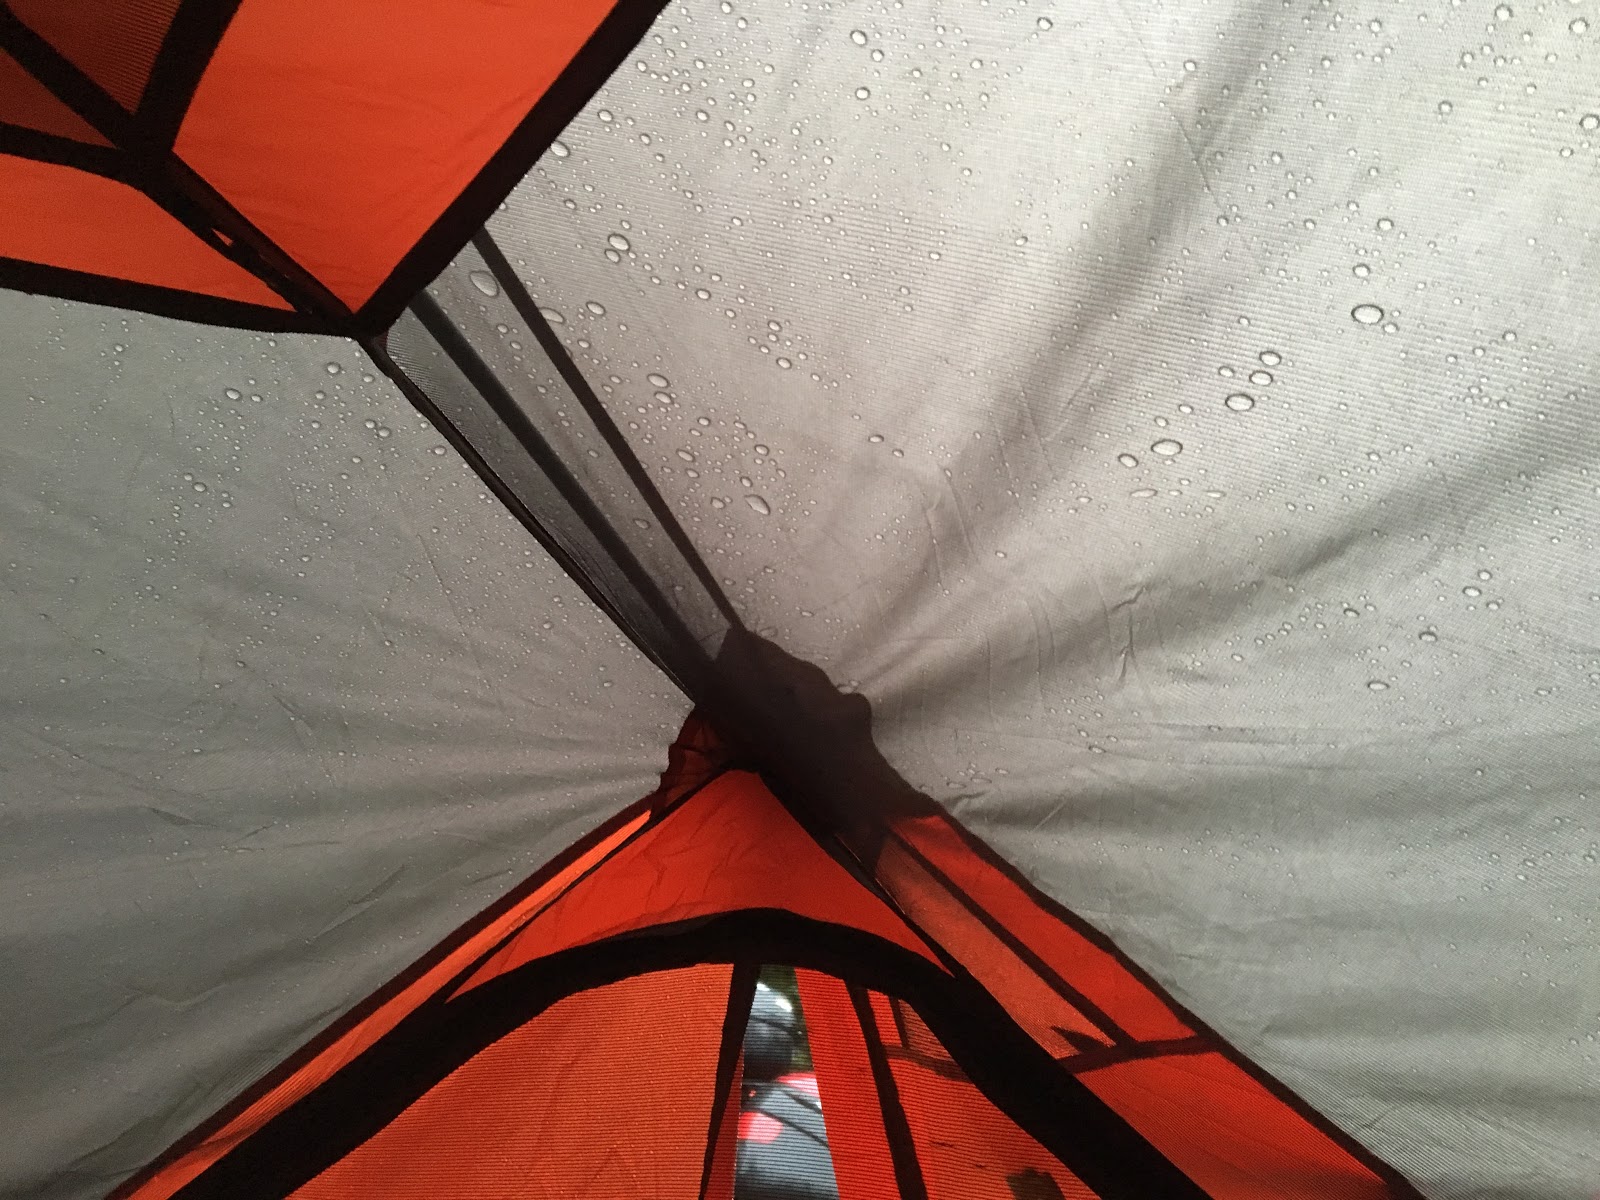
When the initial heavy downpour had subsided, I took a short video of how the rain fly works, and I admit to liking the pale colour as it lets quite a bit of light into the tent, and it becomes easy to see if it is day or night.
 |
| La Zec de la rivière Nouvelle, Qeubec |
Update: 2019-11-13
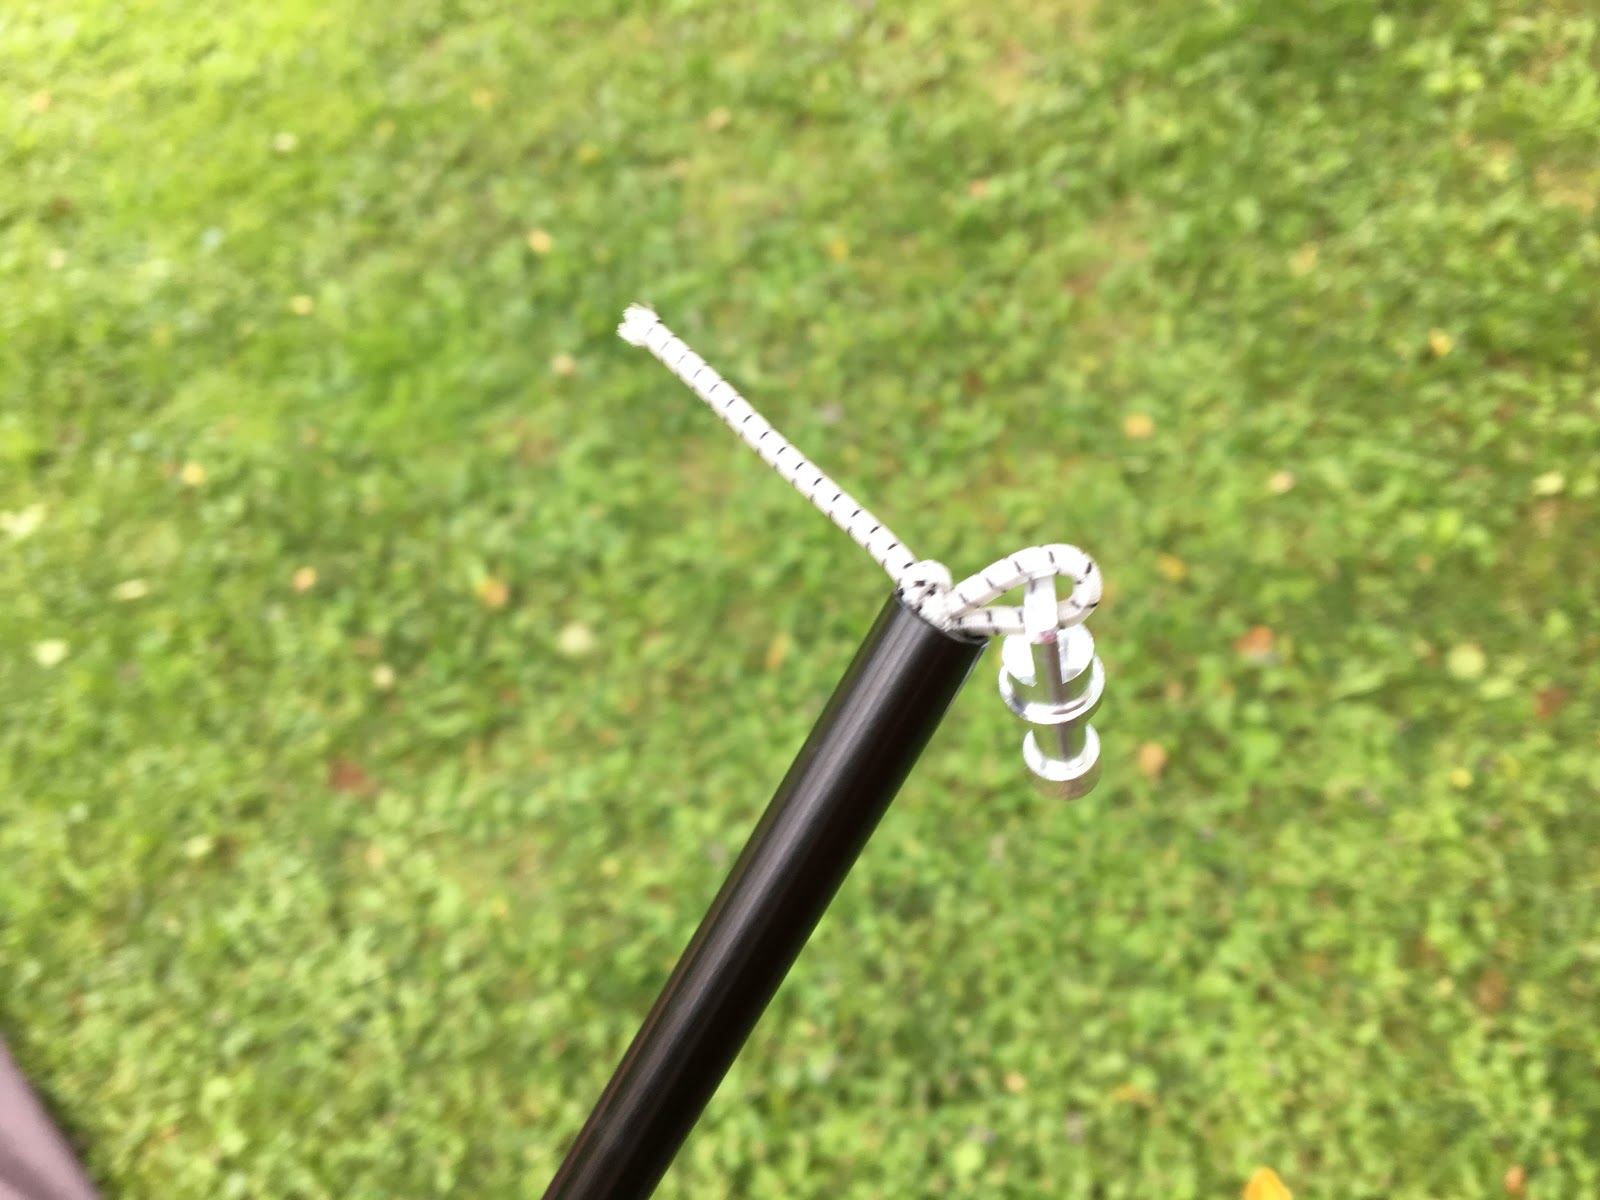 |
| Ferrules that pop out. |
